Español
 العربية
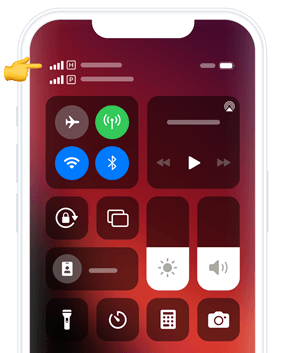
Install just hours before your trip and activate during your flight or when you arrive.
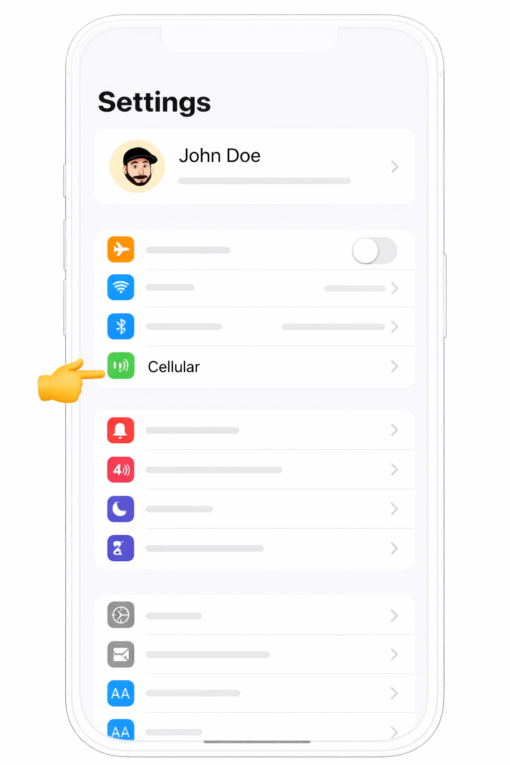
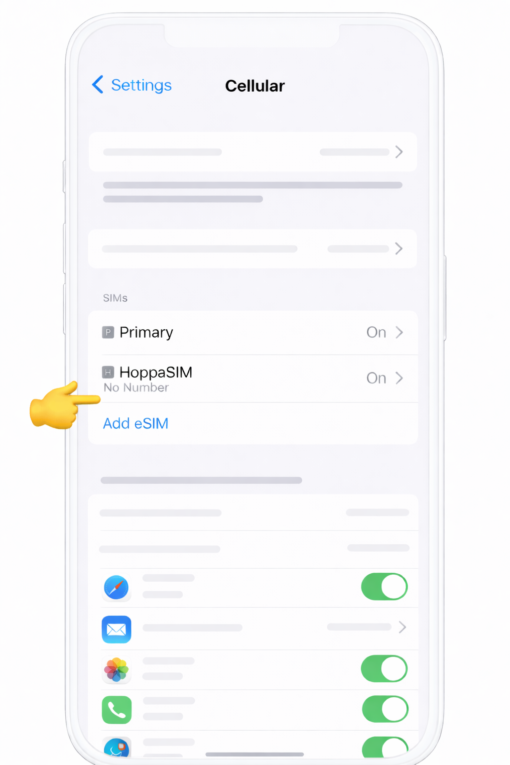
eSIM Installation
Install and activate your eSIM
Select “Install with QR Code” if you have the code on another device to scan.
One-Click Install available
Select “Install Manually” if you are unable to scan the QR code.
Tip: Keep your QR code handy and use Wi-Fi while installing.
SELECT YOUR DEVICE
Choose the device you’re completing the setup on.
SELECT INSTALLATION METHOD
Pick how you’d like to install your eSIM.
LET’S GET STARTED
1
2
3
Install with QR Code
iPhone • QR
Step title
Step description